🚚 FREE DELIVERY IN UKRAINE • 📞 QUICK ORDER: +380 63 571 3650 • 📚 STEM KITS FOR HOME, SCHOOL AND CLUBS
🚚 FREE DELIVERY IN UKRAINE • 📞 QUICK ORDER: +380 63 571 3650 • 📚 STEM KITS FOR HOME, SCHOOL AND CLUBS
🚚 FREE DELIVERY IN UKRAINE • 📞 QUICK ORDER: +380 63 571 3650 • 📚 STEM KITS FOR HOME, SCHOOL AND CLUBS
Easy & Best Homemade Playdough Recipes That Lasts for Months
Making your own playdough is a fun and easy activity that kids and adults alike will enjoy. It is not only more affordable for
Making your own playdough is a fun and easy activity that kids and adults alike will enjoy.
Not only is it more convenient to make your own, but you can also tweak the ingredients in your playdough recipe to create the perfect batch of homemade playdough for your needs.
Although it is always easy to buy baby dough in the store, it is expensive! That’s why we decided to create our own Playdough recipe.
Not only is it cheaper than store-bought Playdough, but it’s also super easy to make. In less than 5 minutes, you’ll have a month’s worth of Playdough!
- Cream of Tartar Playdough Recipe
- The best playdough recipe without cream of tartar
- Playdough recipe with glitter with your own hands
- How to Fix Sticky Playdough
- How to store Playdough
- How to soften dried play dough
- Dough activities for games
In addition, it gives children a great opportunity to be creative and hands-on – mixing materials, measuring and stirring.
Children learn many STEM skills by making their own play dough, such as hands-on math skills of measurement and proportion.
Homemade dough for games. Recipe
Play dough is a wonderful sensory material for children. A favorite activity for children of all ages, Playdough is soft and squishy, easy to mold into different shapes and easy to cut. And it’s a great way to entertain kids both indoors and outdoors.
However, many people do not know that it can be easily prepared at home. Play dough can be made at home using just a few simple ingredients from your pantry.
In this article, we will share with you the best play dough recipes that can be easily customized according to your creativity.
Ingredients for the recipe for the play dough with your own hands
- 2 cups of all-purpose flour
- 1/2 cup of salt
- 1 1/2 cups boiling water. water
- 4 tsp cream of tartar
- 2 Art. vegetable oil (coconut oil, baby oil is also suitable)
- Food coloring – optional
- Large mixing bowl
- Spatula
How to make tart dough
Step 1: In a large bowl, add 2 cups flour, 1/2 cup salt, and 4 tsp. cream of tartar.
Step 2: Mix the dry ingredients well and evenly.
Step 3: Add 2 tbsp. vegetable oil into the flour mixture. You can use coconut oil, olive oil, or any other cooking oil (no baby oil) if you want to make your own edible dough.
If you have older children who don’t put toys in their mouths, you can even use baby oil.
Step 4: Add the boiling water to the mixing bowl, stirring the flour mixture constantly with a spatula. Make sure that there are no knots and lumps in the dough. Continue mixing until the dough is smooth.
A word of caution – as we are using boiling water, we advise you not to touch the dough at this stage.
You can also replace boiling water with warm water. But in the latter case, you will have to cook the dough on medium heat, adding warm water.
Step 5: Let the dough cool. The play dough may feel a little sticky at this point, but that’s okay. As it cools, it will thicken and the stickiness will disappear.
Step 6 Once your play dough is nice and chilled, it’s time to add the food coloring. If you don’t want to color it, leave it as is. He is ready to play.
If you want to make colored play dough, follow these steps.
Step 7: Divide the dough into balls according to the number of colors you want.
Step 8: Make pretty flattened play dough cakes and add a few drops of liquid food coloring to each cake. We recommend using gel food coloring to get brighter colors.
Quick Tip: We noticed that our colored play dough darkened over time. So feel free to add more food coloring if you think the colors are too light.
Step 9. Knead the dough well until all the food coloring is evenly distributed throughout the dough.
Another caveat: To prevent food coloring from contaminating the counter, we recommend covering the counter with waxed paper. And to keep your hands from getting dirty, wear gloves.
Once the food coloring is well mixed into your homemade play dough, it’s time to play with it.
This is one of the best homemade playdough recipes you will find! It makes soft DIY play dough that’s easy to shape, fun to play with, and lasts for months when stored properly.
But if it seems difficult, we advise you to make “Moon Sand”. It is an extremely soft, moldable sand that provides a wonderful sensory experience for toddlers and children.
If you need a gluten-free play dough recipe, simply replace the flour in the recipe above with gluten-free flour. Some of the options are: corn flour, almond flour, and rice flour.
However, we should note that the texture of almond and rice flour is not as smooth as that of DIY play dough made with all-purpose flour.
This easy playdough recipe uses tartar to stabilize and soften homemade playdough. texture.
If you want to make a tartar-free play dough, here’s a quick and easy recipe.
The best dough recipe without tartar
This tartare recipe replaces the tartare with lemon juice. Here’s what you’ll need to make the cake-free dough:
- 2 cups of all-purpose flour
- 1/2 cup of salt
- 1 1/2 cups boiling hot water
- 6 Art. lemon juice
- 2 tbsp. cooking oil
- Gel Food coloring
- Large mixing bowl
- Jug
- Latex gloves
- Wax paper
How to make homemade dough without tartare
Step 1: Add 2 cups all-purpose flour and 1/2 cup salt to a large mixing bowl.
Step 2: Mix the salt and flour until smooth.
Step 3: Add 2 tbsp. vegetable oil into the flour mixture. You can use any oil you like in the tartare recipe. Be it coconut oil or baby oil, depending on whether you want to make a safe version or not.
Step 4: in a jug, mix 6 tbsp. lemon juice from 1 1/2 cups of boiling water.
Step 5: Gradually add the water and lemon juice solution to the flour mixture, stirring the mixture continuously.
Make sure there are no lumps and keep stirring the mixture until it reaches a dough-like consistency and perfectly smooth texture.
Caution: Be sure not to touch the dough with your hands as it will be quite hot from the boiling water.
Step 6: Let the play dough cool before you can add colors or essential oils for a more sensory effect.
If you’re making clear playdough, you’re ready to play with your own playdough.
If you want to add colors, just follow the steps below.
Step 7 : Divide the dough into equal balls depending on the amount of food coloring you have.
Step 8 : Line the counter with waxed paper to prevent stains.
Step 9 : Take one ball of dough at a time and flatten it with your hand. Be sure to add the food coloring to the center of the flattened ball and knead the dough until the food coloring is evenly combined with the play dough.
Quick Tip: To make homemade play dough with the least amount of stains, use lighter colors.
To avoid stains on your child’s hands (as well as clothes and tables), choose light pastel colors and skip brights. Through experience and extensive testing, we’ve found that brighter darker colors remain the most stained even after one or two rounds of play.
Step 10: Finally, add your favorite scent by adding a few drops of essential oils to your homemade play dough to make it smell divine. After adding essential oils, be sure to knead it well.
Our kids love lavender-scented play dough. But you can try any flavors that your kids like. Whether it’s rose, lemongrass, or something fun like flavored gum oil!
Related: If your kids enjoyed making play dough at home, we’re sure they’ll love DIY Kinetic Sand! It’s almost magical how easily it molds, yet maintains its fluidity.
What we appreciate about homemade dough recipes is their flexibility. You can make as many colors as you like with this simple, easy recipe.
Or add another sensory dimension by adding essential oils to make play dough that smells great.
Quick Tip: Try adding Kool-aid to your play dough right before mixing in the water. From it you will get a wonderfully fragrant dough with a light color.
And if these variations are not enough, you can also make play dough with glitter at home. No wonder we think this is the best play dough recipe and the only play dough recipe you will ever need!
Dough recipe for playing with sparkles with your own hands
Making glitter dough at home is just as easy. You can use any of the play dough recipes above – with or without cream of tartar – to make your own scrumptious play dough.
All you need is 2 tbsp. biodegradable or eco-friendly glitter along with the ingredients of your chosen recipe.
How to make play dough with sparkles with your own hands
Step 1: Choose the dough recipe you want to make.
Step 2: Follow all the standard steps before adding water.
Step 3: After you’ve combined the dry ingredients and added the oils, it’s time to add the glitter to the flour mixture before adding to the water. Stir the mixture well to distribute the glitter evenly.
Step 4: Next, add the boiling water and follow the remaining steps of the recipe you are following.
That’s all! Just a small change before adding water and your shiny dough is ready! Such an easy play dough recipe with glitter, right?
Next, you can add food coloring and essential oils to make your glitter dough colorful and smell divine!
How to fix sticky play dough
Sometimes play dough can be sticky. However, our advice is to be patient. This can be easily fixed.
If you find that the playdough has become sticky after adding water, it is best to wait until it cools down. It thickens naturally as it cools, so don’t worry if your homemade playdough gets sticky.
But if the play dough is sticky even after it’s chilled, you can fix that by kneading it or just adding a little all-purpose flour (or gluten-free flour if you’re making a gluten-free version).
Season well for the most part. kneading the flour does its job. If the dough continues to stick, add more flour – in small portions and knead well. This should fix the problem.
How to store homemade play dough
Play dough tends to dry out when left out in the air. To extend its shelf life, you must store it properly.
To prevent play dough from drying out, becoming hard and crumbly, you can store it in an airtight container when not in use. This will help prevent it from drying out and extend its shelf life.
If you live in a humid climate, you can store Playdough in the refrigerator to keep it from getting too sticky.
How to Soften Playdough DIY Again
It is unusual for PlayDough to dry out if not stored properly in airtight containers. However, you don’t need to throw away the dry, crumbly dough. This can be easily fixed.
Play dough that has dried out can often be revived with a little water. Just add a few drops of water to the dough and knead it until it becomes soft again.
If the Playdough is still too crumbly, add a little more water to your playdough until it reaches your desired consistency.
Or simply take a damp towel, wrap the dried play dough in it, and leave overnight in an airtight container or zip lock bag. This tip works wonders on overly dry play dough and rarely fails to revive it.
You can also add a few drops of water to the hard Playdough toys to soften them as well. This is a great way to extend the life of Playdough toys for your child!
Playdough activities to try with kids
Playing with Playdough is a great way to develop children’s creativity and imagination. It can also help improve fine motor skills and hand-eye coordination.
Moreover, play dough is easily integrated with both artistic activities and learning. It is versatile, easy to use and easy on the pocket. Children can play with play dough for hours.
1. Literacy classes
Let the humble play dough be your partner in teaching your children letters and words. Encourage children to make play dough letters. Older children can practice making star words from dough.
Not only will this help them learn, but it will also strengthen their fine motor skills!
Related: Here are some great preschool literacy ideas to try with your kids.
2. Numerical lessons
Teach your kids about numbers and math using play dough as a tool. There are so many ways to teach addition and subtraction with play dough.
Make small balls of play dough and let your child count them. Planning to teach basic operations? Make play dough balls in two colors and let your kids replace the numbers with the play dough balls.
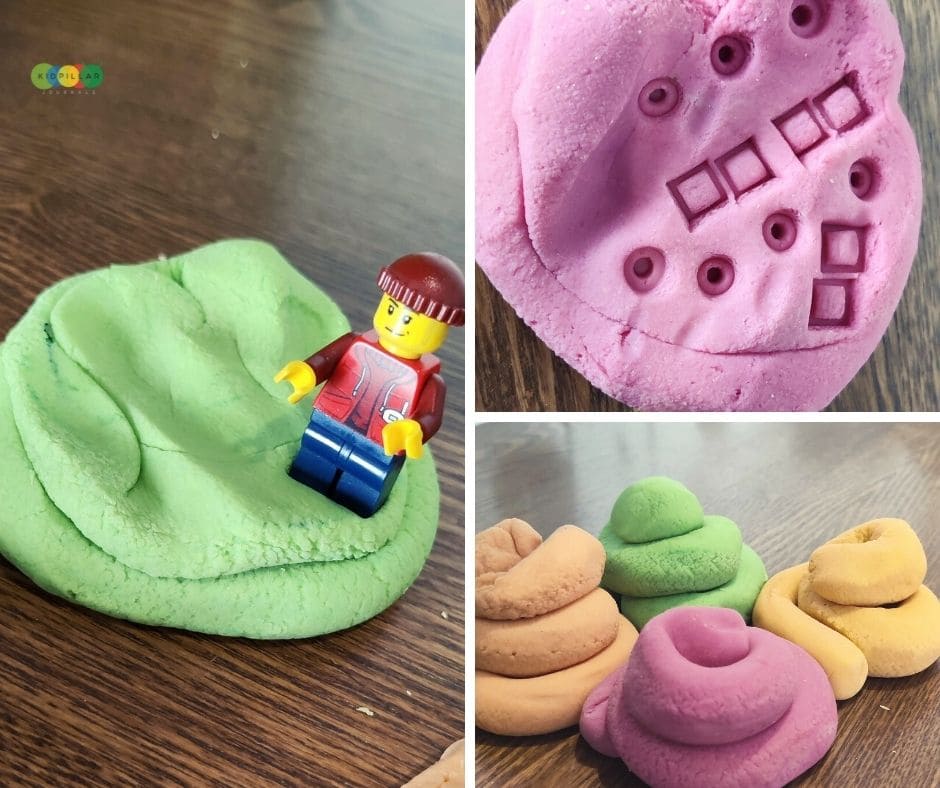
Making dough shapes is another interesting math task for preschoolers. Use cookie cutters to create different play dough shapes.
Click on the play dough to make patterns and let your child figure out what happens next. There are so many fun ways to teach math with play dough. Give free rein to your creativity.
Related: Also try these fun math games for kindergarten. They work like a charm to get into the game.
3. Practice the skills of working with scissors
Nothing is more fun than cutting dough with kid-safe scissors. Let your child cut the play dough into different shapes or simply cut along the lines or patterns marked on the dough.
4. Create art
Perhaps the most popular way to play is to create art. Let your kids roll snakes and snails, make fun dough spikes, cut out pictures, or just let their creativity guide them to create their own play dough art.
5. Pretend games
It’s no secret that children love pretend play. Let your little baker make a play dough cake or just make play dough noodles.
Let your kids make decorations for their dolls (or themselves!) with homemade play dough
They can do so much with play dough!
Related: If your child is a fan of pretend play, nothing can get him/her more excited than playing with Fake Snow in the summer!
With us…
These no-cook recipes are definitely the best homemade playdough recipes to try with kids! We just love how easy they are to customize, letting your kids get creative with their play dough.
Making long-lasting play dough couldn’t be easier.
Have fun!
FAQ
Source: Easy & Best Homemade Playdough Recipes That Lasts for Months